Showing posts with label egg. Show all posts

May 12, 2012

Dandelion Blossom Fritters

I grew up in the foothills of the Rocky Mountains, where sagebrush, pine trees and prickly pear cactus flourished.  Needless to say there was little in the way of manicured lawn, what little we did have was generally a sea of dandelions.  My sister and I learned to forage for edible plants at a young age, as our mother was a botanist and our father was a renaissance man of sorts, and dandelions were one of the easiest and, thanks to my parents, tastiest finds.  I have fond memories of fresh dandelion blossoms being batter and fried for an afternoon snack or side dish at dinner.  I recently relocated to Montana, where spring is just beginning and the many of the lawns host their fair share of dandelions and fritters were on my mind.  They are just as easy and delicious as I remember them being, providing a great use for an otherwise common weed.   Dandelion blossom fritters pair well with buckwheat flatbread and rye or wheat berry salad

The blossoms should be used immediately and may be rinsed, but are easier to fry dry.

2 c dandelion blossoms, stems removed
1 large egg
¼ c flour
¼ c milk
2 tbsp oil
salt and pepper
1. In a small bowl, whisk the egg, milk and flour together until smooth.  Season the batter with salt and pepper.  Makes about one cup of batter.

2. Place the oil in a medium skill over medium heat.  Once the oil is heated, dip a dandelion blossom in the batter, holding the flower by the bottom to fully submerge the blossom in the batter, gently shake and place in the skillet.  Repeat the process until the skillet is full.  Fry the blossoms until golden brown, flipping as needed, about 1 minute.  Remove the blossoms and set aside drain on a paper towel, while continuing to fry the remaining blossoms. 

3. Season the fritters with salt and pepper as desired.  Serve immediately.

Serves 3-4

May 6, 2012

Wilted Spinach Salad with Bacon Dressing

Like many classic American dishes involving bacon, Germans settlers, specifically those settling New England and Pennsylvania, including the Amish and Mennonites, likely brought spinach salad to the Americas.  German immigrants brought a salad recipe which they served in springtime, composed of dandelion greens, bacon, vinegar and hardboiled eggs.  The dandelion salad later evolved into the more familiar spinach salad, which substitutes the dandelion greens for spinach, another spring green, and includes red onions and mushrooms.  Pennsylvania produces the greatest number of mushrooms, an industry started by the Quakers in the late 19th century and increases the likelihood the spinach salad has Pennsylvanian Dutch roots.  The mushrooms and onions can be added raw, but I like to slightly warm both ingredients before add them, so the spinach becomes even more warm and wilted when served as a salad.  Spinach salad is delicious with another German dish, potato salad.  
4 c spinach, roughly torn
½ red onion, thinly sliced
8 button mushrooms, quartered
2 eggs, hardboiled, peeled and roughly chopped
8 strips bacon, cut into 1" pieces
1 tbsp red wine vinegar
¼ tsp mustard
¼ tsp honey
salt and pepper
1. Place the spinach in a large bowl and set aside.  Combine the vinegar, mustard and honey in a small bowl, whisk and set aside. 

2. Heat a large pan over medium heat, add the bacon and fry until golden brown.  Remove the bacon, leaving the fat in the pan and toss the bacon with the spinach.

3. Reduce the heat to medium low, add the onion and sauté until slightly browned.  Add the mushrooms and gently sauté with the onions until they are lightly cooked.  Turn the heat off and remove the onions and mushrooms and toss them with the spinach and bacon. 

4. Pour the vinegar mixture into the pan, whisk well pour over the ingredients in the bowl and toss well.  Season with salt and pepper and serve immediately. 

Serves 2-4

March 8, 2012

Sweet Rosemary Potato Pancakes

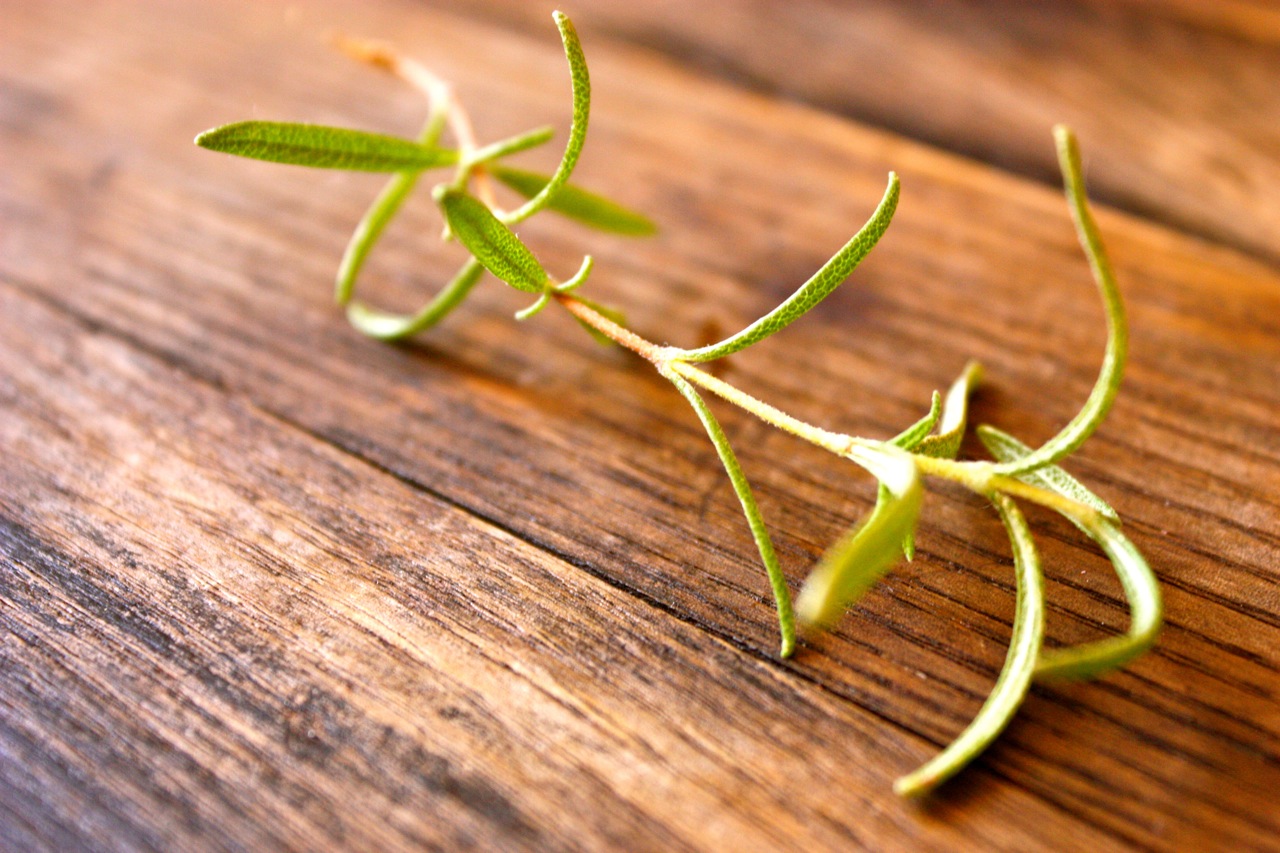
The longer I cook, the more I enjoy using rosemary, maybe because it reminds me of the pines in which I was raised and also because I try to always have a rosemary plant around. Rosemary seems to be one of the more versatile herbs one can use in a kitchen, as it lends itself immensely well to both sweet and savory dishes, and frankly I cannot think of a more well rounded flavor which suits both. Like many herbs we use today, rosemary, an evergreen a related to the mint family, is native to the Mediterranean. The name rosemary derived from the Latin ros marinus or dew of the sea, due to its ability to use humid sea air as its primary source of moisture. Aside from culinary usage, rosemary has long been thought of as a medicinal plant to improve circulation, memory, digestion and the immune system, as well as providing anti-inflammatory properties. Sweet potatoes and rosemary pair very well indeed, as the bold piney flavors taste delicious upon a rich sweet background. These sweet rosemary potato pancakes are made in the style of latkes, with sweet potatoes taking the place of white potatoes.

1 lb sweet potatoes, peeled and grated

1 yellow onion, trimmed and grated

1 tsp fresh rosemary, leaves removed from stem

2 eggs

1 tsp starch, potato or corn

¼ tsp pepper

½ tsp salt

1-2 tbsp olive oil

1. Combine the grated sweet potatoes and salt in a medium-mixing bowl, set potatoes aside for about 10-15 minutes. Drain liquid from potatoes by squeezing them and tightly wrapping them in a clean towel, removing as much excess water as possible. Return drained potatoes to original mixing bowl.

2. Next, combine the potatoes with the onions and rosemary. Add the eggs, starch and pepper and thoroughly combine with the vegetables creating the batter for the pancakes.

3. In a medium frying pan, heat 1 tbsp of oil over medium-low heat. Place a tablespoon of batter in the pan, flatten into a pancake and fry each side until golden brown on both sides, about 5 minutes. Repeat process with remaining batter, adding additional oil as necessary.

4. Serve pancakes warm or room temperature.

Serves 3-4

December 14, 2011

Sweet Potato Pancakes

Sweet potatoes have been on my mind lately, possibly because they are commonly served during winter holiday meals or maybe because I am in the south, where sweet potatoes have been cultivated since the 16th century. In the southern States, sweet potatoes seem to be preferred over regular potatoes and due to their sweeter nature; they are found in a wide array of both savory and sweet dishes, including pies, casseroles, breads, stews and fries. Lately, I have come across sweet potato pancakes on menus and signs; at first I thought were similar to a European potato pancake using grated sweet potatoes as a base, which sounded delicious. However, I subsequently learned, in the south, they are referring to traditional breakfast pancakes, in which cooked mashed sweet potatoes are used in addition to the flour. I found baking the sweet potatoes before adding them to the pancakes, added a depth to the pancakes and created a rich sweet potato flavor in the finished product.

Sweet potatoes can be baked in advance. Sugar and spices can be adjusted to taste, depending upon personal preference.

1 lb sweet potatoes

2 c flour

2 ¼ c milk

¼ c butter, melted

2 eggs

4 tsp baking powder

2 tbsp sugar

½ tsp cinnamon

pinch of nutmeg

½ tsp salt

vegetable oil

1. Preheat oven to 425 degrees. Place the whole sweet potatoes in the oven and bake until tender, 30-45 minutes. Remove from oven, cool slightly, peel and blend until smooth in a medium mixing bowl.

2. Add the dry ingredients to the blended sweet potatoes and thoroughly combine. In a separate bowl, combine the milk, eggs and butter, add to the dry ingredients and potatoes, and gently fold to combine into a smooth batter.

3. Heat a griddle or large skillet over medium-low heat. Once heated, coat the griddle or skillet with oil. Drop about ¼ c of the batter on to the griddle or skillet, repeating until the griddle or skillet is full. Cook pancakes until bubbles appear on the surface, flip and cook until both sides are golden brown and pancakes are fully cooked. Repeat process with remaining batter.

4. Serve sweet potato pancakes warm with butter and maple syrup, if desired.

Serves 3-4

October 25, 2011

Bacon and Broccoli Quiche

A quiche seems like one of the quintessential French dishes adopted by American cuisine during the 20th century, savory cream and egg custard filling in an open face pastry crust. However pastries filled with savory custard date back to at the Romans and the term quiche comes from the German word kuchen for cake, as the modern idea of quiche came about in medieval German cuisine. Any number of different meat, cheese and vegetable variations may be made into a quiche, though bacon and cheese is especially classic given the popularity of quiche Lorraine. I am fond of quiches with vegetables such as broccoli, asparagus, leek, onion or mushrooms in addition to desired meats and/or cheeses.

The bacon and broccoli can easily be substituted for any number of alternative meats, cheese or vegetables depending upon availability and personal preference.

1 c flour

½ c butter, cubed

½ tsp salt

¼ tsp pepper

1 tsp fresh herbs, finely chopped

cold water

3 eggs

1 c cream

1 head broccoli

2 strips bacon, thinly sliced

½ tsp salt

¼ tsp pepper

1. Combine flour, salt, pepper and herbs in food processor and pulse to combine. Add butter and pulse until well combined with flour. Add water 1 tbsp at a time while pulsing until flour mixture just begins to hold together. Remove from processor, form dough into ball, cover with plastic wrap and refrigerate until firm, about 30 minutes.

2. Place flattened dough in between two sheets of parchment paper and roll dough into a 12" circle. Place rolled dough on a 9" pie pan, gently press dough into the shape of the pan and form edge of dough as desired. Refrigerate the dough in the pie pan for 30 minutes before baking.

3. Place bacon in a medium frying pan over medium heat and brown bacon, stirring frequently to prevent sticking. Once bacon has browned, combine bacon with broccoli and set aside. Whisk cream, eggs, salt and pepper until thoroughly combined and set aside.

4. Preheat oven to 375 degrees. Pre-bake crust until set and lightly golden brown, 10-12 minutes. Once crust has set, remove from oven, leaving oven on. Arrange broccoli and bacon evenly along the bottom of the crust. Pour egg mixture over broccoli and bacon. Return quiche to the oven and bake for 15-20 minutes, until firm and clean to a knife. Remove quiche from the oven and let cool for about 15 minutes before serving.

5. Serve quiche warm, room temperature or chilled.

Makes one 9" quiche

October 12, 2011

Potato Pancakes

Potatoes were most likely introduced to Europe by Spanish explorer during the 16th century, so potato pancakes were born after their introduction. Potato pancakes are a staple of many traditional European cuisines especially in Eastern and Northern Europe and one of my favorite ways to eat potatoes. The vegetable pancakes are made using any number of different ingredients depending upon the culinary tradition followed, though all contain either raw or pre-cooked potatoes. I love them because they are reminiscent of the hash browns I loved as a child and can be eaten warm, room temperature or chilled with any number of toppings. Potato pancakes are delicious served with dark greens including collard or kale and bacon braised chicken.

1 lb new potatoes, grated

1 yellow onion, trimmed and grated

2 scallions, finely sliced

1 stalk celery, finely sliced

1 tbsp parsley, finely chopped

2 eggs

1 tsp starch, potato or corn

¼ tsp pepper

½ tsp salt

1-2 tbsp olive oil

1. Combine the grated potatoes and salt in a medium-mixing bowl, set potatoes aside for about 10-15 minutes. Drain liquid from potatoes by squeezing them and tightly wrapping them in a clean towel, removing as much excess water as possible. Return drained potatoes to original mixing bowl.

2. Next, combine the potatoes with the scallions, parsley, onions and celery. Add the eggs, starch and pepper and thoroughly combine with the vegetables creating the batter for the pancakes.

3. In a medium frying pan, heat 1 tbsp of oil over medium-low heat. Place a tablespoon of batter in the pan, flatten into a pancake and fry each side until golden brown on both sides, about 5 minutes. Repeat process with remaining batter, adding additional oil as necessary.

4. Serve pancakes warm or room temperature, with sour cream or applesauce if desired.

Serves 3-4

August 2, 2011

Rustic Peach Berry Tart

Peaches are such a classic summer fruit and so fitting for an early August dessert. Both the botanical term persica and the word peach derive from an early belief in Europe that peaches originated in Persia. Originally domesticated in China thousands of years ago, peaches, a member of the rose family, made their way to Persia and the Mediterranean along the Silk Road. Domesticated peaches are classified as either clingstone, flesh clinging to the stone, or freestone, flesh free of the stone. Berries are a lovely compliment peaches and taste delicious on the shortbread like crust of this peach berry tart.

Any berry may be used in addition to or in place of strawberries.

1 ¼ c flour

2 tbsp sugar

5 tbsp butter

1 egg

1 tbsp milk

¼ tsp salt


2 peaches, pitted and sliced into ½ inch pieces

½ c strawberries, trimmed and quartered

¼ tsp cinnamon

2 tbsp brown sugar

½ tsp corn starch

2 tbsp butter, softened

1. Combine flour, sugar and salt in a medium-mixing bowl. Add the butter and gently combine well with the flour mixture. Add the egg and milk; gently combine until the dough holds together. Press the dough evenly into a pie pan and place the crust into the fridge for about ½ an hour.

2. Meanwhile preheat the oven to 375 degrees. Combine peaches and strawberries in medium mixing bowl. Add the cinnamon, brown sugar and cornstarch and combine well.

3. When the oven is preheated, remove the crust from the fridge and spread fruit evenly over the dough. Dot the softened butter over the fruit. Place the tart in the oven and bake until golden brown, about 15-20 minutes.

4. Remove pie from oven. Let cool for about 20 minutes before serving. Serve warm, room temperature or chilled.

Makes ones 9" tart

June 23, 2011

Veggie Burgers

Burgers made with vegetables, grains, egg and cheese are a great alternative or addition to burgers made with meat. Though it is possible to grill a veggie burger with a good amount of fat and care, they fry up just as easily and taste just as delicious. Most any ingredients can be used for the burger depending upon what flavors are desired but I have found beans create great texture and flavor not to mention additional protein. Veggie burgers are delicious topped with traditional and non-traditional burger toppings and a great with any number of vegetable sides.

Different kind of beans may be used, along with different cheeses and herbs.

½ c cooked black beans

1 c cooked chickpeas

2 eggs

½ c bread crumbs, finely ground

½ tsp rosemary, finely chopped

½ tsp oregano, finely chopped

1 shallot, finely diced

1 scallion, finely diced

½ c cheddar cheese, grated

½ tsp salt

¼ tsp ground pepper

1 tbsp olive oil

1. Place chickpeas and black beans in a food processor and pulse into a course meal. Combine beans, eggs, breadcrumbs, rosemary, oregano, shallot, scallion, cheese, salt and pepper in a medium-mixing bowl. Thoroughly combine ingredients.

2. Form mixture into patties of desired size, depending upon burger preference.

3. Heat olive oil in a large skillet over medium heat. Fry patties in batches until golden brown, 3-4 minutes per side. Serve veggie burgers warm with bread and toppings of choice.

Makes 4-12 patties depending on size of patty

May 13, 2011

Summer Squash Fritters

Young squash, such as zucchini and summer, are a vegetable stand-by for me, and I try to always have them on hand because they are a useful versatile vegetable. I have found they can be added to many different dishes to increase the amount and diversity of vegetables consumed, not to mention texture and flavor. However, they are also lovely on their own, or at least made the central ingredient, with their smooth texture and light taste. Though they are so mild and fresh, they do maintain integrity while cooked, a nice quality in any ingredient. I decided to pair them with fresh herbs and lemon for a spring inspired fritters. Technically a fritter is coated with a batter and then fried, but I decided to combine the vegetables with the batter, creating a cross between a fritter and a pancake of sorts, proving culinary terms and labels can be complicated indeed. These fritters would be delicious paired with a beet salad and roasted potatoes.

Straight summer squash or zucchini will work just as well as the combination.

1 medium zucchini, grated

1 medium summer squash, grated

2 scallions, finely chopped

1 clove garlic, pressed or finely chopped

1 tbsp parsley, finely chopped

1 egg

¼ c parmesan, grated

1 tbsp flour

1 tsp lemon zest

1 tsp salt

¼ tsp black pepper, ground

1 tbsp olive oil

1. Place grated zucchini and summer squash in a colander, sprinkle with salt, toss and drain for about 20 minutes. Wrap the squash in cheese cloth and squeeze to remove excess water. Once squash is mostly dry, wrap in a clean dish towel and set aside.

2. Combine scallions, garlic, lemon zest, pepper, parmesan, flour and egg in a medium mixing bowl. Stir to combine, add squash and thoroughly mix ingredients.

3. Meanwhile, heat olive oil in a medium skillet over medium heat. Form batter into 1" balls and flatten into patties, about ½" thick. Fry patties until golden brown, 3-4 minutes per side. Continue process until all batter has been fried.

4. Serve fritters warm, room temperature or cold.

Makes 8 fritters

May 5, 2011

Leek Galette

A galette is a free-form rustic pie or tart, depending on the crust used, commonly associated with French cuisine. Galettes are great alternatives to traditional pies and tarts as their lack of structure and ease in forming make them beautiful and unique, leaving size, shape and form up to each individual cook. A galette can be made either sweet or savory depending upon preference and can be filled with any number of different ingredients as long as the filling is not too moist, as the crust needs to be able to contain the filling on its own. After discovering leeks are delicious baked on their own with few additional ingredients, I started making leek galettes a few years ago. Leek galettes go well with any number of dishes including butternut squash soup or purée, mashed carrots or smashed new potatoes.

For everyone who requested this recipe.

Crust

1 ¼ c flour

½ c butter

¼ tsp salt

¼ tsp pepper

¼ - ½ c cold water

Filling

2 leeks, trimmed, halved and chopped into ¼ wide strips

1 tbsp butter

salt and pepper

1 egg, beaten

1. To make filling: heat butter in a skillet over medium heat. Add leek and sauté until lightly cooked and brilliant green, 3-4 minutes. Remove from heat and season to taste with salt and pepper. Set filling aside to cool while making crust.

2. To make crust: thoroughly combine flour, butter, salt and pepper in a mixing bowl or food processor. Slowly add ice water, 1 tbsp at a time, to flour mixture and gently combine until dough begins to form. Being careful not to add too much water or over work dough. Form dough into a ball and place in the refrigerator for at least 20 minutes. Crust may be made and refrigerated up to one day in advance.

3. Preheat oven to 375 degrees. Remove crust from refrigerator and place in between two 18" sections of parchment paper. Roll dough into large circle, between 10-12" in diameter and ¼" thick. Remove parchment paper from crust and place crust on a baking sheet.

4. Mound filling into a circle in the center of crust about 1" thick, leaving a 2" edge. Fold edge of crust around leek filling, gently pressing folded crust around filling. Using a pastry brush, brush crust with egg.

5. Place galette in oven and bake until golden brown, 25-40 minutes. Remove galette and cool for at least 15 minutes before serving.

6. Slice galette and serve warm, room temperature or chilled.

Makes one 8-10" galette

March 20, 2011

Gnocchi

Although gnocchi has been eaten in Italy since Roman times, gnocchi has only been relatively recently made with potato due to the introduction of the potato to Europe from the Americas in the 16th century. Prior to the potato, gnocchi was made with semolina or wheat flour. I was first introduced to true Italian gnocchi while in the Cinque Terre region of Italy where it was eaten most commonly with basil pesto. Now I like to make my own gnocchi because, though labor intensive, it is simple to prepare and very satisfying. Both arugula pesto and roasted cherry tomatoes make lovely sauces for the gnocchi.

I eat gnocchi with a variety of toppings including pesto, marinara and garlic butter. One batch will serve 2 easily with enough to freeze for a later meal.

1 ½ lbs russet potatoes

1 egg

1 ¼ c flour plus more for dusting

1 tsp salt

olive oil

1. Boil potatoes in water under tender, 30-45 minutes. Once tender, remove from water and peel. Pass potatoes through a potato ricer, food mill or grater and place in a large mixing bowl.

2. Add egg, flour and salt to mixing bowl and gently combine into dough. Knead dough gently until dry to touch and elastic, 4-5 minutes. Form into a ball and place under a damp towel in a mixing bowl. Allow dough to rest for no more than 30 minutes.

3. Using flour for dusting as needed, roll the dough into fist size balls and keep balls under a damp towel. Roll ball into a long dowel with a ¾-1 inch diameter. Cut the dowel into 1-inch segments. Using a flour-dipped fork, roll each segment under the fork until an oblong dumpling or gnocchi is formed. Place gnocchi on a clean cookie sheet. Repeat process with rest of dough.

4. Bring a large pot of water to a boil. Working in batches, drop gnocchi into boiling water and cook until the gnocchi float, 1-2 minutes. Drain cooked gnocchi and toss with olive oil under ready to eat.

5. To freeze gnocchi: place uncooked gnocchi on a cookie sheet or similar flat pan in the freezer. Once frozen, place gnocchi in a freezer bag and return to freezer. Gnocchi may be frozen for up to 3 months. Cook frozen gnocchi as you would fresh.

Makes about 4 dozen gnocchi


February 22, 2011

Chocolate Chip Cookies

Although I do not have a particularly strong sweet tooth, I do love making sweets. Chocolate chip cookies might be one of my favorite things to bake, a simple yet classic cookie. A few years ago, the magazine Cooks Illustrated gave me the idea to freeze cookie balls for future use, so as to always be able to have fresh baked cookies on the ready. It might be one of the most useful tips I have learned because it means I am able to make a full batch of cookies but only bake them on an as needed basis. Given that I am usually cooking for a limited amount of people, frozen cookie balls are a perfect solution to fresh cookie issues.

Frozen dough does not seem to bake any longer than fresh dough. Make sure the dry ingredients and any additional flour is well combined before choosing to add more.

2 - 2 ½ c white flour

1 tsp baking soda

1 c brown sugar

½ c granulated sugar

1 ½ tsp vanilla

½ tsp salt

1 c butter, softened

2 eggs

2 c semi-sweet chocolate chips or chunks


1. Preheat oven to 375 degrees. In a small mixing bowl, combine 2 c flour, baking soda and salt and set aside.

2. Next, thoroughly combine butter and sugars until light and creamy. Add vanilla and eggs and continue combining until light and creamy.

3. Slowly begin to add dry ingredients to wet ingredients, being sure the ingredients are well mixed. Add additional flour, in small amounts, as necessary until the cookie dough just comes together to form balls without being too wet but still being moist and sticky. Once dough has reached desired consistency, add chocolate chips and stir to combine. Roll dough into one-inch balls.

4. To bake: place cookie balls on baking sheets allowing for two inches between cookies. Bake cookies between 5-10 minutes depending upon oven temperature variations and personal preference, watching carefully as they tend to bake quickly.

5. To freeze: place cookie balls on a baking sheet or baking pan which will be able to fit into your freezer. Cookie balls may be placed close together. Place the full sheet or pan in the freezer and freeze cookie balls for at least four hours. Once cookie balls are frozen, transfer to a zip lock bag and return to freezer. Follow baking instructions above. Cookie balls may be frozen up to 4 months.

Makes about 4 dozen cookies